How do I calibrate transparencies correctly?
Are you using effects like drop shadow, glow effect or color gradients? Congrats, you are using transparencies. But there is nothing as annoying as a poorly calibrated transparency. Luckily, it's your lucky day! It is not that difficult to calibrate, as you might learn from below explanation:
Adobe Illustrator
Are you using Adobe Illustrator? Select your transparency, click object > flatten transparency in the menu. That's all.
Adobe InDesign
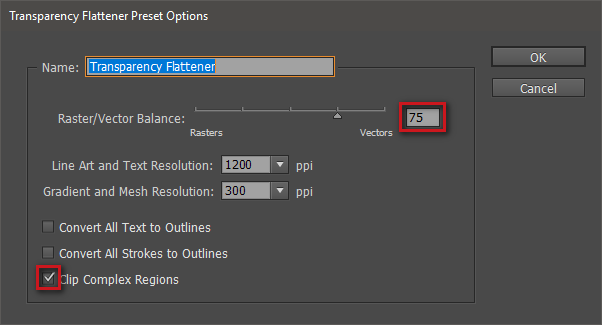
In Adobe InDesign, you have to do something extra, but only the first time. Go to edit > transparency flattener presets, choose "high resolution" and click "new". You will see a new screen (figure 1).
- Enter a name. It doesn't matter which name, just make sure you remember it.
- Put raster/vector balance from 100 to 75
- Tick the box "clip complex regions"
- Click "OK".

Figure 1: create a new transparency flattener preset in Adobe InDesign
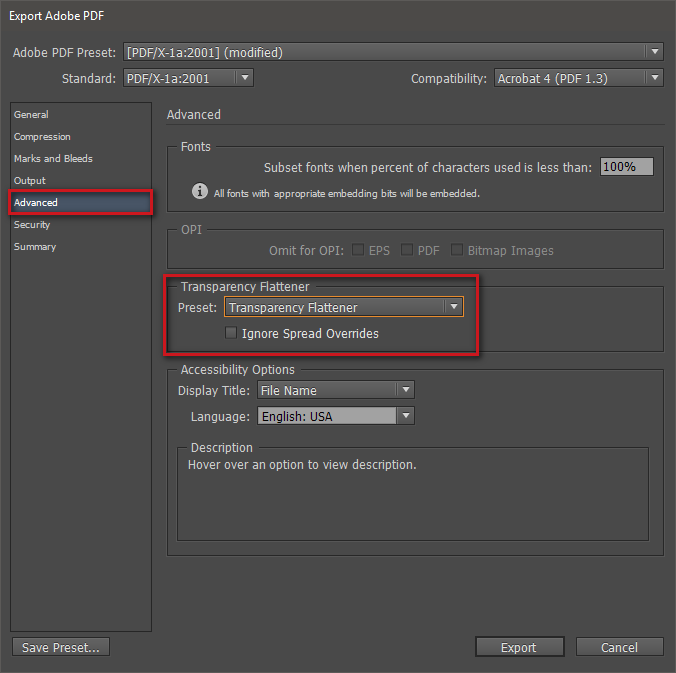
Once the transparency flattener preset has been created, you don't have to do this again. From now on, when you save the PDF, indicate what preset you want to use. You do this by going to file > export. In the screen that pops up, choose the correct settings for your PDF. Go to advanced and choose the transparency flattener preset with the name you chose earlier. That's it, you can now export your PDF. Easy peasy

Figure 2: select the transparency flattener preset while exporting the PDF


